Why do we vCommunity?

I went out for a lunch walk the other day to clear my head and listened to a really great episode of Freakonomics. The episode Honey I grew the economy focused on the process and motivators that drive innovation. The deep dive into drivers in particular resonated a lot with me. I saw parallels to how we approach IT as we kick off 2020. While that was super interesting, it wasn’t a giant leap for me to ask a similar question of:

Why do we get engaged in the various technological communities and what do we derive from those communities?

This seemed like a fun opportunity to hear from some of our Technology Community members to understand: Why do we vCommunity?

To Learn

For me, first and foremost, vCommunity is about Education. It stands to reason that it’s the most common entry point for people to engage. It makes sense: You need help on a topic, so you go looking around and only then do you learn about the plethora of opportunity’s available to you. When I personally started down the virtualization path, training dollars were tight, so to improve my knowledge I had to look elsewhere and as luck would have it, I found the Boston VMUG UserCon. That free one day training, gave me access to educational presentations, subject matter experts and hands on training. It was a formative moment for me, and opened my eyes to other avenues of learning. It also showed me that there were a ton of engaged people out there sharing via different mediums.

Stalwart of the vCommunity, Kyle Ruddy had something similar to share regarding his introduction to the tech communities “What I wasn’t ready for was the amount of blogs out there detailing issues I had run into. It was a complete lightbulb moment. From that point it was a gradual process of moving from reading blogs to creating blogs.”

Kyle also highlights a hallmark of the community in that there tends to be a strong desire to contribute back in the form of blogs, videos, podcasts and a host of other mediums. That was after all the genesis for VirtualVT as well. If you look at the mechanics of sharing content, it takes time and effort. You can’t help but boost your knowledge whenever you’re contributing technical content, because you end up spending more time with the underlying technology’s.  Unintentional education? Knowledge Osmosis? Whatever you call it, the brain gets bigger the more you feed it, and you have to keep feeding if you’re creating content about technologies.

To Grow

Bolstering your knowledge via the educational opportunities the communities provide is definitely a path to bigger and better things, but I’ll let you in on a not-so-secret, secret. Getting involved and putting yourself out there as a contributing member of the community can be equally impactful on your career. Contributing is an idealistic endeavor, but it often has the side effect of building your brand at the same time. I met the MVP power couple of Dave and Cristal Kawula this past fall and in a recent blog post Dave shares a bit about how he and Cristal started MVPDays and the impact their event has had on a specific community member: “…I talked him into doing his first presentation, which led to him speaking at user groups and conferences. Earlier this year he became a Microsoft MVP, and a few days ago, he actually accepted a position at Microsoft.

The experience that Dave highlights is not unique to MVPDays. It crosses groups and goes to the heart of what Matt Heldstab (VMUG Board of Directors) shared with me recently “The fantastic power of this vCommunity and its ability to elevate the careers of its members never ceases to amaze me.

It’s Fun!

vDodgeBall, vSoccer, vPoker are just a few of the side-events that come to mind for ways that we like to enjoy the lighter side of our geekdom. One of my favorite events was when our 2017 vExpert party was held at the Pinball Museum in Las Vegas. The reality is that many of us work really hard and through a plethora of events, engagement in the vCommunity can be a nice way to blow off some steam. My friend AJ Murry who I co-led a local VMUG group with, hits on this point “In the vCommunity I have found my people. I have made life long friends. I have learned great things and shared amazing experiences.

It’s all about the people

2019-12-31 14_09_51-Community _ Definition of Community by Merriam-WebsterI mean it’s referred to as the vCommunity for a reason! The one theme that comes up time and time again when talking about our tech communities, was the value of our peer connections. We learn, share and when times are tough, we support each other. Nikola Pejkova, Veeam Vanguard Community Mangager highlights the value of these connections: “I love being part of community because it enables its members cooperate together, strengthen and enrich their knowledge and learn from each others experiences.

Everywhere I’ve gone and nearly everyone I’ve interacted with has been gracious with their knowledge and time. It’s a hallmark of these communities and a reason why there are so many deep bonds. You see it in every independent blog post, every community presentation and every response to a forum post. That’s the real magic to the vCommunity: We want to be there for each other and to collective lift each other up!

So how do YOU get involved?

It’s an amazing thing being part of this community, but like many things in this world, it can be intimated to get started, so what can YOU do?

Well there’s no time like the present. There are user communities abound. Listen, I live in a rural state where my favorite urban legend says that there are more cows than people. If I can find a local community, so can you! Find one (meetup can be an excellent starting point) and go, even if it’s not in your wheelhouse. Especially if it’s not in your wheelhouse! Go learn something new, meet some interesting people and hopefully have a good time!

Got something worthwhile to share? A blog is stupid easy to create these days. I wouldn’t be here if it wasn’t! Only a year or two, it was really hard to podcast or create video equipment, as the equipment required was cost prohibitive to most. As we kick off 2020, there’s no reason not to share it loud a proud! And if creating online content isn’t enough for you, there are always conference CFPs (calls for papers) that are looking for passionate people to share their successes.

All of these options strike fear into your heart, but you’d still like to help others? Online opportunities are abound as well. Helping someone solve a problem or answer a question in a forum, benefits not just you and poster, but future assistance seekers as well.

Whatever the avenue, just do it! If you’re still not convinced, I’d like to give Kyle the last word on why we vCommunity. “Now, why do I continue to be involved… over the years, I’ve found it extremely rewarding to share my experiences and knowledge, become a mentor, [and] … build up a number of friendships that exist still to this day.”

Thank you to my friends quoted here and to all my friends out and about in the communities for all that you do.

This VM is getting long in the tooth…

Leverage Operations Manager to check the “summary|oversized metric and if the VM crosses thresholds… So long, farewell, auf Wiedersehen, good night

### Connect to vROps server
$cred=Get-Credential
Connect-OMServer -Server "Demo" -Credential $cred -AuthSource "ADdomain"

### set some things that will be used later when we do some things
$when = $(get-date).AddDays(-20)
$vkey = "Summary|Oversized"
$threshold = ".75"

foreach ($vm in $(get-vm|Select-Object -First 33)){
    ### get-stats on each VM from vROps
    $vrstat=$vm|Get-OMResource
    $avg = $vrstat|Get-OMStat -Key $vkey -from $when|Select-Object -ExpandProperty Value|Measure-Object -Average

    ### Remove VM's that surpass the threshold
    write-host $vm.name, $avg.average
    if($avg.Average -gt $threshold){
        write-host $vm.name, $avg.average
        if($vm.PowerState -eq "PoweredOn"){
            ### Confirm and WhatIf have been set to true in order to protect the innocent
            stop-vm -vm $vm -Confirm:$true -WhatIf:$true
        }
    Start-Sleep 3
    ### Confirm and WhatIf have been set to true in order to protect the innocent
    Remove-VM -vm $vm -DeletePermanently -RunAsync -Confirm:$true -WhatIf:$true
    }
}

Get-EsxCli oh my!

This post is the first detailed post coming out of my presentation Ditch the UI – vSphere Management with PowerCLI at the CT VMUG Usercon. Stay tuned for the full bakers dozen of code posts!

esxcli, oh my…

I was finishing a task the day before my presentation, at the CT VMUG usercon – Ditch the UI when I happened to come across the cmdlet Get-ESXCli. My first thought was “No. Really? This command exists and I’m just finding out about it now?” sigh…

But yes it’s true, the fine folks on the PowerCLI provided us this cmdlet some time ago, and I’m just learning about it now. Well, better late than never as they say.

Before we go any further, let’s take a minute to talk about esxcli. ESXCLI is a command line interface (duh) for ESXi systems. It’s a means to modify the VMHost systems, mostly but not entirely, as it relates to the hardware systems. It’s an early & essential, but limited, way of configuring some of the management elements for your ESXi hosts.

Now I mention it’s limitations because they are essential to our story. The first big limitation is the structure of tool. It’s structure is that of namespaces with a hierarchical tree. This means that when you want to access, oh I don’t know, VMFS information/properties/methods you had to know that VMFS exists as a sub-namespaces under the esxcli storage namespace. Not a big deal and some folks actually like the structure, although it’s never really work for me.

Of bigger concern with esxcli, is locality. What I mean is that it was difficult to manage multiple systems. Of course you had options like the vMA or vCLI, but again you’re limited with connectivity options. And it was ugly to programatically try to get around these limitations.

Needless to say I was stoked to come across get-esxcli the other day.

Get-ESXCli! Oh My!!!

I’m a tinkerer. When I see a new toy, I just want to fiddle with it. That being said, I also know from experience (good and bad) what you can do with esxcli, so my first stop on Wednesday was get-help.

2018-03-02 21_27_50-Windows PowerShell

Not terribly helpful… I guess we have no choice but to dive in. To start off, I saved the output of get-esxcli to a variable.

$esxcli=get-esxcli -VMHost $vmhost -V2

Now that we’ve got esxcli (see what I did there?) stored as an object, let’s see what we can do. First things first, echo it back to the screen to see what we get right out of the gate.

esxcli

Ok… well, this gives me something to go off of. It looks just like the structure of esxcli. I suppose that this shouldn’t be shocking, but it certainly is reassuring that we’re treading in semi-familiar territory. So it’s probably save to start moving down the tree.

esxcli_network_nic

Thank you Jeffrey Snover and team for allowing us to experience the wonders of things like tab complete and accessing sub-elements via the dot operator. So looking at a the output of $esxcli.network.nic we see that we can access things like TCP Segmentation Offload and VLAN’s. We get a few direct methods against our current level of the tree in addition to a Help() method.

esxcli_network_nic_help

OK, so this is starting to make a little more sense now. We’re basically taking the same namespaces and methods, but just making them look like PowerShell. At this point I figured I was good to go and just started firing off commands… which resulted in a lot of red text. After one of my frustrating attempts I actually paid attention to what tab-complete was showing me

esxcli_network_nic_down_authcomplete

Hey there “Invoke”? What are you doing there? How come I haven’t seen you in these parts before? After a few tests to get the syntax down, I learned that the .Invoke() method is how we actually get work done, and I can get down to the task I’d originally been so happy to automate.

Accessing the VAAI primitive

Ok, so I wasn’t quite ready to get to work yet.

$esxcli.storage.vmfs.unmap.Help()

After checking out help, just to make sure, I was ready to go…

Here’s my first script using the get-esxcli cmdlet. My whole intent was to programmatically go through my datastores, which resided on a thin-provisioned SAN, to free up any space that needed reclamation.

### Disclaimer. This one needs work, I was just so excited to learn about this cmdlet! To be continued....
Set-PowerCLIConfiguration -WebOperationTimeoutSeconds -1 -Scope Session -Confirm:$false

foreach ($cluster in $(get-cluster)){
  $dsarray=get-cluster $cluster|get-datastore
  $vmhost=get-cluster $cluster|Get-VMHost|select -First 1
  $esxcli=get-esxcli -VMHost $vmhost -V2
  foreach ($ds in $dsarray|where{$_.Type -eq 'VMFS'}){
      $esxcli.storage.vmfs.unmap.Invoke(@{reclaimunit = 60; volumelabel =$ds.name})
  }
}

I went at this script knowing that my storage volumes were mapped to all hosts in each of my clusters. If you weren’t in a similar vanilla situation you’d have to get a bit tricksier with your selection logic. However with knowledge of my environment at hand it was pretty simple to:

line 4: Iterate through each of my clusters.
line 5: Get each datastore for the specified cluster
line 6: Get the first VMHost in the cluster. This is ok because I know that all datastores are associated with all hosts in a given cluster.
line 7: Use our new friend get-esxcli against the previously retrieved VMHost.
lines 8-10: Iterate through each datastore in the cluster and run leverage the invoke method against the VMFS UNMAP primative
$esxcli.storage.vmfs.unmap.Invoke(@{reclaimunit = 60; volumelabel =$ds.name})

With that I was able to return a not insignificant amount of freed up space back to my array. After writing PowerShell code leveraging PowerCLI for the last few years, I’m feeling like I have a new array of opportunities open to me after newly discovering the Get-ESXCli cmdlet.

Happy scripting!

Scott


Performance Reports via vCenter statistics

Leverage get-stat to pull statistics from vCenter, build performance report based on averages

Connect-VIServer 
$myCol = @()
$start = (Get-Date).AddDays(-30)
$finish = Get-Date

$objServers = get-cluster cluster | Get-VM
foreach ($server in $objServers) {
    if ($server.guest.osfullname -ne $NULL){
        if ($server.guest.osfullname.contains("Windows")){
            $stats = get-stat -Entity $server -Stat "cpu.usage.average","mem.usage.average" -Start $start -Finish $finish

            $ServerInfo = ""|Select vName, OS, Mem, AvgMem, MaxMem, CPU, AvgCPU, MaxCPU, pDisk, Host
            $ServerInfo.vName  = $server.name
            $ServerInfo.OS     = $server.guest.osfullname
            $ServerInfo.Host   = $server.vmhost.name
            $ServerInfo.Mem    = $server.memoryGB
            $ServerInfo.AvgMem = $("{0:N2}" -f ($stats | where {$_.MetricId -eq "mem.usage.average"} |Measure-Object -Property Value -Average ).Average)
            $ServerInfo.MaxMem = $("{0:N2}" -f ($stats | where {$_.MetricId -eq "mem.usage.average"} |Measure-Object -Property Value -Maximum ).Maximum)
            $ServerInfo.CPU    = $server.numcpu
            $ServerInfo.AvgCPU = $("{0:N2}" -f ($stats | where {$_.MetricId -eq "cpu.usage.average"} |Measure-Object -Property Value -Average ).Average)
            $ServerInfo.MaxCPU = $("{0:N2}" -f ($stats | where {$_.MetricId -eq "cpu.usage.average"} |Measure-Object -Property Value -Maximum ).Maximum)
            $ServerInfo.pDisk  =[Math]::Round($server.ProvisionedSpaceGB,2)

            $mycol+=$ServerInfo
        }
    }
}

$myCol |Sort-Object vName| export-csv "VM_report.csv" -NoTypeInformation

Install programs via Invoke-VMScript

This script is a sample from a presentation I gave at the Connecticut VMUG UserCon. You can see all of the scripts from that presentation here. CTVMUG – Ditch the UI

I first wrote about the wonder of Invoke-VMScript just about a year ago. If you were to search this blog, you’d see that it turns up quite often. Honestly if the fine folks that work on PowerCLI had stopped after Invoke-VMScript, I’d probably have been OK with that.

Cutting to the chase Invoke-VMScript allows you to run scripts within a Virtual Machine’s OS. It’s a very powerful tool in that you can run PowerShell, batch or bash scripts within the context of the VM’s Windows or Linux OS.

Why would you want to automate this amazing tool? Why wouldn’t you want to?!? By leveraging this beautiful cmdlet, you can in many cases fully automate the deployment of a VM or installation of a VM within an app. Let’s be honest, as awesome as templates are they can only take you so far. Automation tools like vRA essentially operate off the same behavior, and not everyone has the funding to get those tools. For people like me Invoke-VMScript can be an extremely powerful tool that can be leveraged to great effect.

2018-03-03 22_27_45-Tom Angleberger quote_ Didn't Gandalf say _With great power comes great responsi
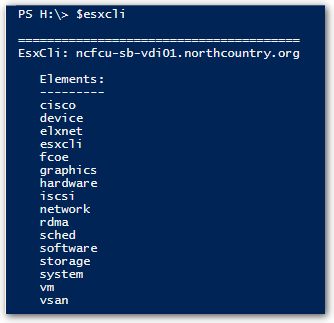
However, with great power comes great responsibility. Because of the power presented with this tool, I’d recommend that you pay close attention to Role Based Access Control (among many other reasons). If you have a VM admin or operator with overly generous permissions, not only can they negatively impact your vSphere environment but they can also impact your VM’s as well, never mind compliance/auditing bag of worms that you can open.

OK, so we got the bad out of the way, here’s one of my favorite pieces of code I’ve ever written. It’s my favorite because it’s not pretty, but it sure gets the job done and moves the ball forward. That’s what we’re trying to do here, so here’s an example of how to leverage Invoke-VMScript to interact with VM OS.

write-host "Installing .NET Framework 4.5.2. If this step errors, you may be able to run the install script at c:\temp\.net4.5.2install.ps1"

    $installScript = @(
        'if (!$(test-path c:\temp\.NET4.5.2)) { New-Item -ItemType directory -path c:\temp\.NET4.5.2 }',
        '$NetFxURL = "http://download.microsoft.com/download/E/2/1/E21644B5-2DF2-47C2-91BD-63C560427900/NDP452-KB2901907-x86-x64-AllOS-ENU.exe"',
        '$NetFxPath = "c:\temp\.NET4.5.2\NDP452-KB2901907-x86-x64-AllOS-ENU.exe"',
        '$WebClient = New-Object System.Net.WebClient',
        '$WebClient.DownloadFile($NetFxURL,$NetFxPath)',
        '$process = (Start-Process -FilePath $NetFxPath -ArgumentList "/q /norestart" -Wait -Verb RunAs -PassThru)',
        'wuauclt /detectnow /reportnow',
        'wuauclt /updatenow'
    )

    foreach ($line in $installScript) {
        Invoke-VMScript `
			-ScriptText "echo ""$line"">>C:\temp\.net4.5.2install.ps1" `
			-ScriptType Bat `
			-vm $serverData.Hostname `
			-GuestCredential $creds.LocalAdmin
    }

    Invoke-VMScript `
		-ScriptText "echo ""$line"">>C:\temp\.net4.5.2install.ps1" `
		-ScriptType Bat `
		-vm $serverData.Hostname `
		-GuestCredential $creds.LocalAdmin
}

Please note this script could be condensed considerably by removing the backtick ` that allows us to continue a script command onto the next line, as exampled on lines 14-27

line 3-12: Store a series of commands into the array $installScript
line 14-20: Iterate through the $installScript array. For each line make use of the Install-VMScript command to echo the value out to a local file within the VM.
line 22-27: Use Invoke-VMScript to call the script that was created in the previous block.

It’s that simple. But I guess that’s the beauty of the solution. There are way more complicated ways of accomplishing the same ends. BUT if you have the tool, it’s easy and it’s free… Well I guess I’ll end this post similarly to how I started it: Why wouldn’t you make use of this amazing tool….

Checking SPBM compliance

Use New-VIProperty to save SPBM object within VirtualMachine objects.
Test to see if VM’s are compliant with their assign policy. If not, migrate to compliant storage.


### warning, highly inefficient code follows. simply an example for how to use VIproperty
New-VIProperty -Name SpbmCompliance -ObjectType VirtualMachine -Value {
$Args[0]| Get-SpbmEntityConfiguration -CheckComplianceNow
} -Force
### end of inefficient code. well, kind of...

$targetobject=get-cluster cluster|get-vm|Where-Object {$_.name -match "sql" -or $_.name -match "application" -or $_.name -match "linux"}

### Iterate through the targetobjects and check compliance status.
foreach ($vm in $targetobject){
if ($vm.SpbmCompliance.ComplianceStatus -ne "compliant"){
write-host "uh oh, $vm not compliant with $($($vm.SpbmCompliance).StoragePolicy)" -ForegroundColor Red -BackgroundColor White
### do something about nonCompliance
$tag=$($vm|Get-TagAssignment|Where-Object{$_.tag.Category -match "StorageTiers"}).Tag.Name
$destStorage=Get-SpbmCompatibleStorage -StoragePolicy $tag"Policy"|Select-Object -First 1
move-vm $vm -Datastore $destStorage
$(get-vm $vm).SpbmCompliance.ComplianceStatus
}
else{
write-host "Hooray $VM is super duper compliant!" -ForegroundColor Black -BackgroundColor Green
}
}

Tag based SPBM policy

Tags->rule->ruleset->policy

$targetobject=get-cluster NCFCU-SB-DC-cl|get-vm|Where-Object {$_.name -match "sql" -or $_.name -match "application" -or $_.name -match "linux"}


### Setup tags, rules, SPBM policy
New-TagCategory -Name "StorageTiers" -Cardinality Multiple -EntityType Datastore, VirtualMachine 

foreach ($category in @("Gold","Silver","Whatever")){
  New-Tag -Name $category"Tier" -Category "StorageTiers" 
  $rule = New-SpbmRule -AnyOfTags $(get-tag -Name $category"Tier") 
  $ruleset =New-SpbmRuleSet -Name $category"RuleSet" -AllOfRules $rule  
  New-SpbmStoragePolicy -Name $category"TierPolicy" -AnyOfRuleSets $ruleset 
  
  ###one line version
  ###New-SpbmStoragePolicy -Name $category"Policy" -RuleSet (New-SpbmRuleSet -Name $category"RuleSet" -AllOfRules @(New-SpbmRule -AnyOfTags $(new-tag -Name $category"Tier" -Category "StorageTiers")))
}


### assign tags to disks
New-TagAssignment -Tag "GoldTier" -Entity $(get-datastore ServerSL1)
New-TagAssignment -Tag "SilverTier" -Entity $(get-datastore ServerSL2)
New-TagAssignment -Tag "WhateverTier" -Entity $(get-datastore ServerSL3)


### iterate through targetobject, setting tags & policy
foreach ($vm in $targetobject){
  switch -Wildcard ($vm.name){
    '*sql*'{
        $tag="GoldTier"
    }
    '*application*'{
        $tag="SilverTier"
    }
    '*linux*'{
        $tag="WhateverTier"
    }
  }

  ### If there's a tag, assign the appropriate policy that matches tags.
  if($tag){
    New-TagAssignment -Entity $vm -Tag $tag  
    Set-SpbmEntityConfiguration -Configuration $(Get-SpbmEntityConfiguration $vm) -StoragePolicy $tag"Policy"
  }
  Clear-Variable tag
}

Cleanup snapshots

Nobody likes old or bloated VM snapshots, but we’ve all had to deal with them from time to time. If you were feeling super crotchety or perhaps confident, you could run this simple one-liner and just take out all of the snapshots in your cluster.

get-cluster cluster|get-vm|get-snapshot|remove-snapshot -whatif

First off, I left the -whatif parameter in this snip to protect the innocent. But I guess if you’re really feeling that cranky…

Chances are you don’t want to be that guy, so perhaps a kinder approach might be warranted?

Get all snapshots in the targetobject and if surpassing the specified thresholds email your lazy admin
$datethreshold=-30
$sizethreshold=10
$targetobject=get-cluster cluster|get-vm

$snaps=$targetobject|Get-Snapshot

foreach($snap in $snaps) {
  if ($snap.created -lt (get-date).adddays($datethreshold) -or $snap.SizeGB -gt $sizethreshold) {
    $source="$global:DefaultVIServer@your.org"
    $dest="LazyAdmin@your.org"
    $subject="Clean up your room!"
    $relay="relay.your.org"
    $body="
      You've got some housecleaning to do:
      VM:           $($snap.VM)
      Snap name:    $($snap.name)
      Created date: $($snap.created)
      Size (GB):    $([math]::Round($snap.SizeGB,2))
    "
    Send-MailMessage -to $dest -From $source -Subject $subject -Body $body -SmtpServer $relay 

    #if you don't care about other peoples snapshots, just uncomment the next line and boom!
    #$snap|remove-snapshot
  }
}


Building Blocks: PowerCLI HardDisk #2, introducing parameters and functions

Build upon the previous Build Block example and introduce defining parameters and functions

Also introduce New-VIProperty

### Define input parameter
param
(
  [string[]]$Guests,
  $DiskSize,
  [decimal[]]$DiskNumber=0,
  [string[]]$Volume=$true,
  [string[]]$RemoveSnapshot=$true
)


### Function to get server ready for disk expansion
function Set-SnapReady{
  Param(
    $Guest
  )
  if (get-snapshot -vm $Guest  -ea SilentlyContinue){
    if($RemoveSnapshot = $false){
      write-host "Cannot expand disks due to snapshots. Exiting"
      Exit
    }
    else{
        get-snapshot -VM $Guest |remove-snapshot
    }
  }
}

### Function to extend virtual disk
function Set-DiskSize{
  Param(
    $Guest,
    $DiskSize,
    [decimal[]]$DiskNumber,
    [string[]]$Volume
  )
  if($Guest.Staaatus -ne "GuestToolsRunning" ){
    Write-Host "Too bad so sad, you'll have to manually extend the OS partition. Maybe you should fix VMtools..."
    get-vm $Guest|Get-HardDisk -name "Hard disk $DiskNumber"|Set-HardDisk -CapacityGB $DiskSize -Confirm:$false
  }
  else {
    get-vm $Guest|Get-HardDisk -name "Hard disk $DiskNumber"|Set-HardDisk -CapacityGB $DiskSize -ResizeGuestPartition -Confirm:$false
  }
  Get-HardDisk -VM $Guest -name "Hard disk $DiskNumber"
}


### main loop
New-VIProperty -ObjectType InventoryItem -Name "Staaatus" -ValueFromExtensionProperty 'Guest.ToolsRunningStatus' -Force

foreach ($Guest in $Guests){
  $Guest=get-vm $Guest
  Set-SnapReady $Guest
  Set-DiskSize $Guest $DiskSize $DiskNumber $Volume
}

Building Blocks: PowerCLI HardDisk #1

This script is a sample from a presentation I gave at the Connecticut VMUG UserCon. You can see all of the scripts from that presentation here. CTVMUG – Ditch the UI

Perhaps I’ve mis-titled this post… In reality this code chunk really introduces us to the power of the PowerCLI cmdlet Invoke-VMScript. It’s probably my biggest go-to cmdlet when working with guest operating systems. This became plainly obvious to me when I searched this blog for the string. I write about it here, here, here, and here. I also talk about it here.

This building block is actually the same chunk of code that we showed at VMworld 2017.

$cred=Get-Credential 

$Guest = Get-VM -Name "Sql01"
$DiskSize = 40
$Disk = "Hard Disk 2"
$Volume = "D"

$objDisk = Get-HardDisk -VM $Guest -Name $disk
$objDisk | Set-HardDisk -CapacityGB $DiskSize -Confirm:$false
$scriptBlock = @"
    echo rescan > c:\Temp\diskpart.txt
    echo select vol $Volume >> c:\Temp\diskpart.txt
    echo extend >> c:\Temp\diskpart.txt
    diskpart.exe /s c:\Temp\diskpart.txt
"@
Invoke-VMScript -vm $Guest -ScriptText $scriptBlock -ScriptType BAT -GuestCredential $cred 

Invoke-VMScript -vm $Guest -ScriptText "Get-PSDrive -Name $volume" -ScriptType PowerShell -GuestCredential $cred

line 1: Use the Get-Credential to prompt the user to input credentials for use later in the Invoke-VMScript cmdlet. Store these as a PScredential object in $cred.
line 3-6: Set our variables.
line 8: Return the harddisk that we’ll be working with via Get-HardDisk
line 9: Set the size of the VM hard disk that was retrieved on line 8
line 10-15: Use a Here-String to set the command that will be run in the guest OS context.
line 16: Using our friend Invoke-VMScript and our Here-String, we run the $scriptBlock in the context of the VM as a batch file.
line 18: Finally in line 18 we use Invoke-VMScript to show that the OS drive has been expanded to match our defined variable.

Easy Peasy! Our next building block is going to be even more fun, as we’ll take a very similar example to start showing how we can define our own script parameters and functions! Until then, be well!